
Walksnail Avatar HD Pro Kit,Testing a digital video feedback and image stabilization system
March 24 2023 – ddaniel

The Avatar HD VTX V2 box?
It displays the same dimensions as its predecessor, 33 x 33 mm, but its thickness takes 1 mm more: it measures 10.5 mm in height. If you are replacing an Avatar HD VTX model, be aware that you will have to check that the extra millimeter is not a problem. The case heats up a lot when powered, so it is recommended to be careful to let the air flow around it during flight. That said, I didn't take any special precautions during my assembly, and the case never got hot in flight. On the ground, during updates and adjustments, I used a portable fan to avoid trouble.
![]()
Mounting the box?
It has mounting holes at 25.5 x 25.5 mm which are shared with the screws for the antenna support bars and the cable to the camera. But this V2 also adds holes to 20 x 20 mm. Both are threaded. Convenient for mounting on narrow frames: this allows fixing, even if the box protrudes on the sides. Care must be taken that the pairing button is accessible, it is located right next to the power connectors. It is also necessary to ensure that the connector for connecting to the computer is accessible. Too bad, the two are opposite each other, so the box must be accessible from both sides. Right next to the pairing button is the activity indicator LED.
![]()
Power supply and UART connection?
To work, the box simply needs to be powered with a voltage between 6V and 25.2 V (i.e. 2S to 6S), and to be connected to the GND. To take advantage of additional functions such as OSD Canvas, telemetry, automatic recording, it must be connected to a UART of the flight controller (TX and RX). For this, CaddxFPV offers two methods. The first is based on a 4-pin JST 1.0 connector, with the help of a cable provided in the box. The 4 wires of this cable are to be soldered on the flight controller. The other method is to solder the wires directly to 4 pads.
![]()
Pad or connector?
Each method has its advantages and disadvantages. The connector makes it easy to move the case from one device to another but protrudes slightly on the side. The pad allows a more solid, cleaner assembly, which does not protrude, but it is fixed. Pay attention to this detail: the order of the + and the GND is not the same on the pads and on the wires! Double check before fueling… and use a smoke stopper to avoid drama. A good point: the assignments of wires and pads are indicated directly on the edge of the case. CaddxFPV specifies that a capacitor is required in the case of a 6S power supply to avoid voltage peaks.
![]()
The antenna?
The one supplied with the box is a polarized LHCP. It measures 10.5 cm in its entirety, 5.5 cm from its u.FL connector to its rigid base, and 1.5 cm in diameter. To install it, you must remove the retaining bar by removing one of the two screws, then put it back so that its u.FL connector is secure. Note that unlike the Avatar JD micro/nano case, and like the Avatar Mini 1S, there is only one antenna.
![]()
The Avatar HD Pro camera?
It is based on a Sony Starvis II sensor, 8 megapixels in 1/1.8'', 16/9 format. Its optics provide an FOV of 160° and an F1.6 aperture. The minimum brightness is 0.0001 Lux: this promises interesting behavior in very low light conditions. Its dimensions are 19 x 19 x 24 mm with 2 no fixings on either side. It can be mounted upright or upside down: it is possible to flip the image 180° in the settings. The camera is connected to the box by a cable inserted into a 14 cm cable.
![]()
The weight of the components?
The Avatar HD VTX V2 case, Avatar HD Pro camera and cable weigh 30.2 grams. The antenna adds 2.3 grams and the cable with connector 0.6 grams. The total is therefore 33.1 grams.
![]()
Internal memory?
The Avatar HD VTX V2 box has an internal memory of 8 or 32 GB. That of the Avatar HD Pro Kit displays 32 GB. This memory is used to store videos, gyroscope data, and to install updates. There is no memory card on the Avatar HD VTX V2, nor a USB connector. The connector is actually a 6-pin JST0.8. It is intended to connect the box to a computer via USB. For this, CaddxFPV delivers in the box a cable that plugs into the box on one side, and into a USB-C adapter on the other, also provided.
Is this cable practical?
Not really. The socket on the case, the cable and the USB-C adapter are very fragile! You have to plug and unplug carefully so as not to force or tear anything – we are far from the ease of use of a USB-C connector. In addition, the socket on the box side is easily disconnected, a little too much. CaddxFPV probably chose this solution to save a few grams, a little volume and probably a few euros in royalties. Note that the box must be powered (and therefore the drone powered up) to access the memory, it is not able to operate by drawing its energy from the connector (unlike DJI O3 for example).
![]()
The update ?
An update is needed for the Avatar HD Pro Kit, but also on the receiver side (glasses, or headphones, or external VRX). To do this, you must download the archive found here. The procedure is the same for all the components: place the firmware file on a memory card or in the internal memory, as the case may be, turn on the component, wait a few seconds, then press and hold (about 8 seconds) on the pairing button. The procedure is very fast with the transmitters (VTX): the LED flashes red then turns green when it is finished. Remember to ventilate the receiver during the procedure to avoid overheating. The update takes longer with the receivers: they beep for quite a long time, the procedure indicating that it ends with a long beep. Be patient, and especially do not cut the power supply during the update.
![]()
Navigating through the update files?
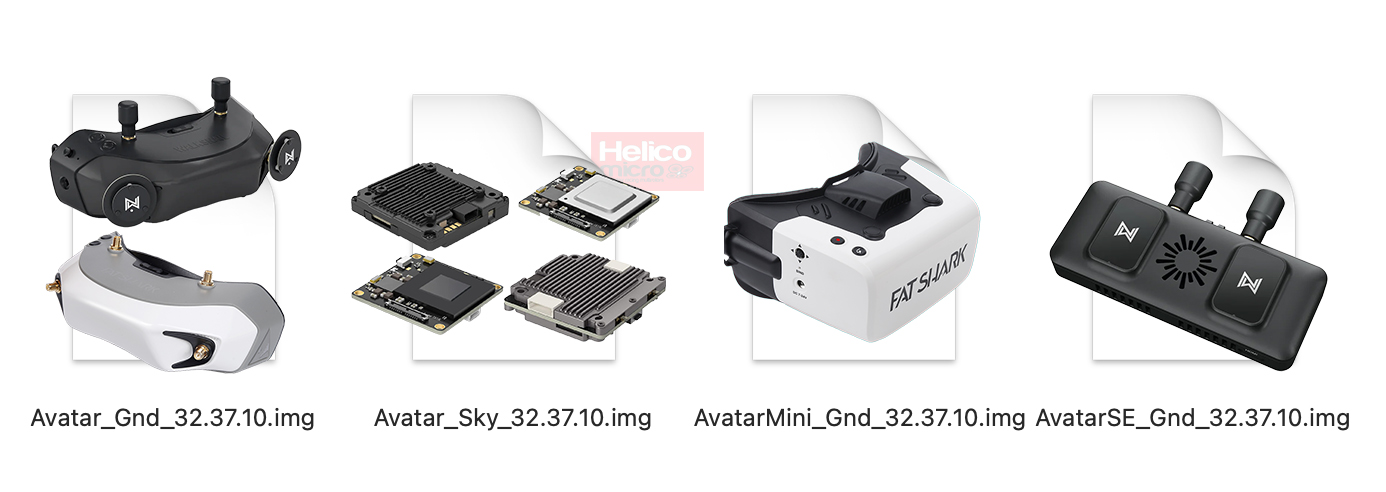
When you download the update archive, you must decompress it (it is in .rar format). After that ? You have to use the right file!
- Avatar_Gnd_XXXXX.img -> to be placed at the root of the memory card of the Caddx Avatar HD FPV System and Fat Shark HD03 goggles
- Avatar_Sky_XXXXX.img -> to be placed at the root of the internal memory of Avatar Mini 1S, Avatar HD VTX, Avatar HD VTX V2 video transmitters
- AvatarSE_Gnd_XXXXX.img -> to be placed at the root of the memory card of the Avatar VRX receiver
-
AvatarMini_Gnd_XXXXX.img -> to be placed at the root of the memory card of the Fat Shark Recon HD helmet
Pairing?
The procedure is simple: it takes a simple press of the button on the VTX box, and a simple press of the button on the receiver. Remember to bring a fine tip if you have to press the button on the glasses in the field! The connection is established very quickly. There is no need to activate the hardware first on a PC or Mac as is the case with DJI.
![]()
Settings with Betaflight?
I exclusively used the Avatar HD Pro Kit with Betaflight. With Betaflight 4.4, simply indicate the UART in the Peripherals column of the Ports tab, under the VTX (MSP+Displayport) label, then use the Preset OSD for FPV.WTF, DJI O3 Avatar HD in the nail Presets. Don't forget to choose HD in the OSD settings to enjoy a full screen display. With Betaflight 4.3, you must activate the MSP corresponding to the UART used in the Ports tab. Then activate the Avatar HD VTXs Preset in the Presets tab and choose the UART and map to displayport.
![]()
By default ?
The Avatar HD VTX V2 box probably works in CE mode by default to comply with the frequency ranges authorized in Europe. It therefore displays only 4 channels: 5735, 5770, 5805 and 5839 MHz. This allows 4 people to fly simultaneously. You can get 4 additional channels, the 5660, 5695, 5878, 5914 MHz to fly 8 simultaneously.![]()
To do this, download the avatar_std.txt file found in this archive and place it at the root of the memory card of the glasses, headset or external VRX. But it is not legal in Europe.
By default, again?
In CE mode, one would expect the box to cap the transmission power at 25 mW, the maximum authorized in Europe. However, the Avatar HD VTX V2 box can go up to 700 mW! If you want even more, it's possible, but again illegal. To do this, download the avatar_pwr.txt file found in this archive and place it at the root of the memory card of the glasses, headset or external VRX. The power can go up to 1000 and 1200 mW! It works on Avatar HD VTX, Avatar HD VTX V2. On the Avatar Mini 1S, the power caps out at 350 mW.
Image definitions?
![]()
The Avatar HD Pro camera is capable of shooting 1080p at 60 frames per second, and 720p at 60 and 120 frames per second. The Avatar HD VTX V2 box supports 1080p/60, 720p/60 and 720p/100 (not 120). Caddx assured me that a future firmware update would enable 1080p/120 on the VTX side. This will have to be checked. The images are in 16:9 (1280 x 720p). The 4:3 mode is present, but it introduces black bars on the edges for video feedback, and the DVR images remain in 16:9. 4:3 Full mode removes black bars. Here is an example of the 720p video return and the 1080p DVR .
In flight?
Compared to other Avatar cameras, the Avatar HD Pro camera delivers images with more nuance in underexposed areas. This is probably an HDR-like function. The side effect is an overexposure of the bright areas. You have to play with the exposure (EV) to avoid burnt clouds.
The video link?
It looked very similar to other Avatar video transmitters, with a similar range, but I didn't have time to check for difficulty with penetrating obstacles and going behind vegetation. I noticed that the return was sensitive to the placement of the antenna: too close to the carbon structure, the range was reduced significantly.
I got better results by making it stick out a lot from the frame. As for the latency, I didn't feel any – but I'm not a good enough pilot to notice it.
![]()
Jello?
I used the Avatar HD Pro Kit on a single frame, an iFlight DC5 that accommodated various video feedback systems. During my flights, I experienced a light Jello, whereas I did not have any with the other systems. Weird. Maybe an ND filter will reduce those unwanted vibrations – but I didn't have a compatible one handy.
In low light?
CaddxFPV ensures that the Avatar HD Pro camera allows flying in very low light conditions… and it's true! In an almost totally black environment, we see the details enough to perceive the obstacles. It even retains color management! Obviously, the images are excessively noisy, but they do not introduce motion blur. To put it simply: the camera goes very high in ISO without increasing the shutter speed. The maximum values of ISO and shutter speed are unfortunately not indicated in the technical sheet. The best result is obtained in 60 fps, the 100 fps mode is less effective in low light.
It's used for ?
This sensitivity makes it possible to fly with enough detail in the image to fly at night with very weak light sources, even in moonlight! Or in dark interiors, in bando for example. Note: night flights in the Open category are not authorized in France except on model aircraft grounds with localization of activity and indication in aeronautical information. For the record, the aeronautical night begins 30 minutes after sunset and ends 30 minutes before sunrise – which allows you to fly between dog and wolf! (except in the DOM-TOM, where the 30 minutes become 15 minutes)
![]()
Gyro data?
This is one of the strengths advertised by CaddxFPV: the Avatar HD Pro Kit stores gyroscope data for use with the Gyroflow software stabilization tool . In practice, this gyroscope IMU component is found in the Avatar HD Pro camera. This means paying extra attention to isolating the camera from vibration, with TPU or shock absorbers, to get the best result. The data is transmitted to the Avatar HD VTX V2 box which stores it in a text file with the same name as that of the .mp4 video, but with the .gcs extension.
![]()
Stabilization with Gyroflow?
The first tests I made were rough: the data was not presented in the right order (xYZ) whereas it takes yXZ, I had to intervene manually. I didn't have the right lens profile either. But the axis order is now the correct one, and Caddx shared some lens profiles to me. In the end, the stabilization under Gyroflow is correct, but not completely satisfactory for several reasons. The first is that the image is stored in 1080p: the stabilization seriously nibbles the edges of the image, and the cropping result is closer to 720p than to 1080p.
![]()
And then…
The second is that I sometimes obtained additional parasitic lurches after stabilization, despite a “clean” frame behavior that is satisfactory with DJI O3 and GoPro stabilization. The third is that the light Jello contributes to the presence of parasites after stabilization. The fourth is that sequences of rapid movements trigger too much zoom in Gyroflow (or black bands if dynamic zoom is disabled).
![]()
Against competition ?
What are the stabilized images worth compared to those of a DJI O3? From a GoPro? From a DJI Action 2? If only because the definition is very low (1080p degraded by the cropping of images), the result obtained with the Avatar HD Pro is well below the competition. To return with beautiful flight images, it will therefore still be necessary to rely on a stabilized sports camera, such as GoPro.
"Promising"?
This is the qualifier that applies to CaddxFPV products: they are “promising”. Which means that they are operational, but that the software part is not fully completed. For the Avatar HD Pro Kit, we note that the Share mode does not work (yet), nor does the 1080p/120. Buying this system from CaddxFPV means trusting them on the development of the internal software. Previous updates have indeed fixed bugs and added features and that's encouraging. But it's also frustrating to buy a product that isn't finalized.
![]()
Can we expect 2.7K?
Sony's Starvis II sensor is capable of delivering 4K (8 megapixel) images at up to 90 fps. Obviously, the on-board electronics are not able to ensure the processing of this data, which consumes too much processor time, and which would cause excessive heating. However, it would be very nice to take advantage of sequences in 2.7K/60 fps to maintain sufficient definition after applying stabilization. But there is no indication that this will be possible on the Avatar HD Pro Kit.
What do I learn from my tests?
As usual with Walksnail products, the promise is very interesting. It's almost held… But the firmware is still a little green, not completely finished. If you believe that the manufacturers' promises are theirs alone, take the time to monitor how the firmware evolves in the coming weeks before buying. The price is correct, since the Avatar HD Pro Kit is barely more expensive (by €10) than the previous version: it is positioned at $159 directly from CaddxFPV (excluding shipping and taxes), and at €190 from StudioSPORT ( taxes included).
![]()
Should I buy it?
If you use DJI Air Unit or O3, the Avatar HD Pro Kit is of no interest, go your way. Ditto if you are already using HDZero. If you are in analog and want to switch to digital, this kit is very attractive, especially if you were used to a high-sensitivity camera for indoor lighttrack flights! Especially since unlike the DJI solution, other Walksnail products can be used to equip the 1S racers in your fleet. If you are already equipped with Walksnail, the Avatar HD Pro Kit is perfect for equipping your future devices with 2S or more, taking advantage of the high-sensitivity camera and image stabilization.
![]()
Review source : www.helicomicro.com
0 comments